


In this article we will learn how to create and configure an Elastic Block Store volume and also attach it to an EC2 instance.
Note: The EC2 and EBS volume must be in the same availability zone.
We need to first create an EC2 instance
Log in to your AWS Console.
Navigate to the EC2 dashboard
Click on "Launch Instance" and enter a name for the EC2 E.g. Test Sever.
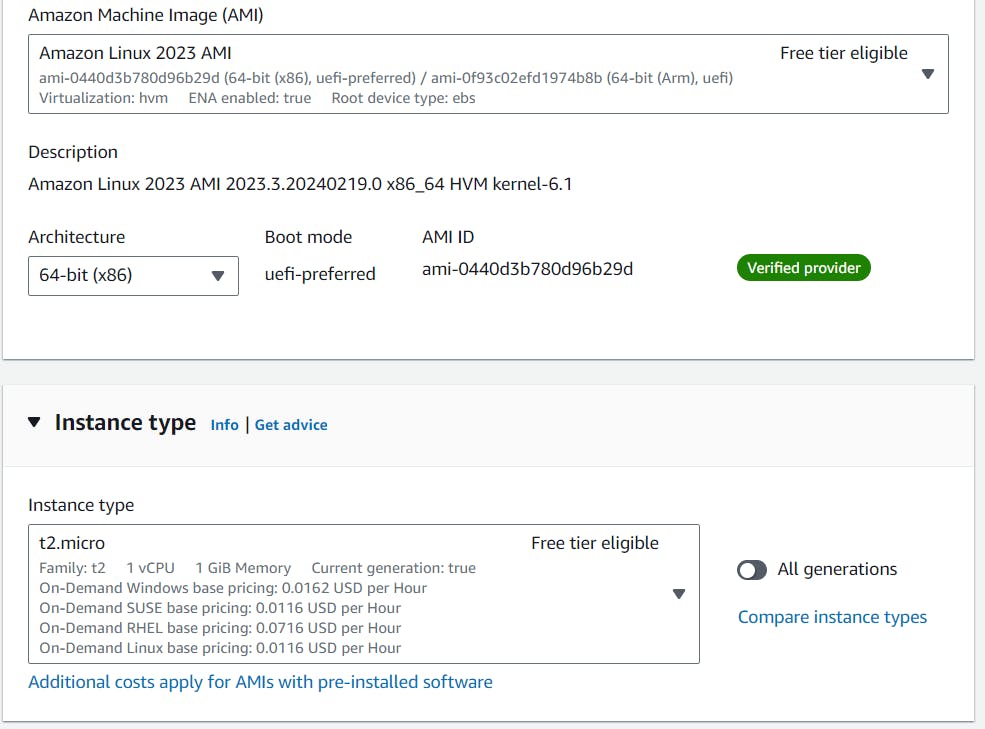
Choose an Amazon Machine Image (AMI) of your choice. E.g. Amazon Linux
Choose an instance type (Select one within the free tier)
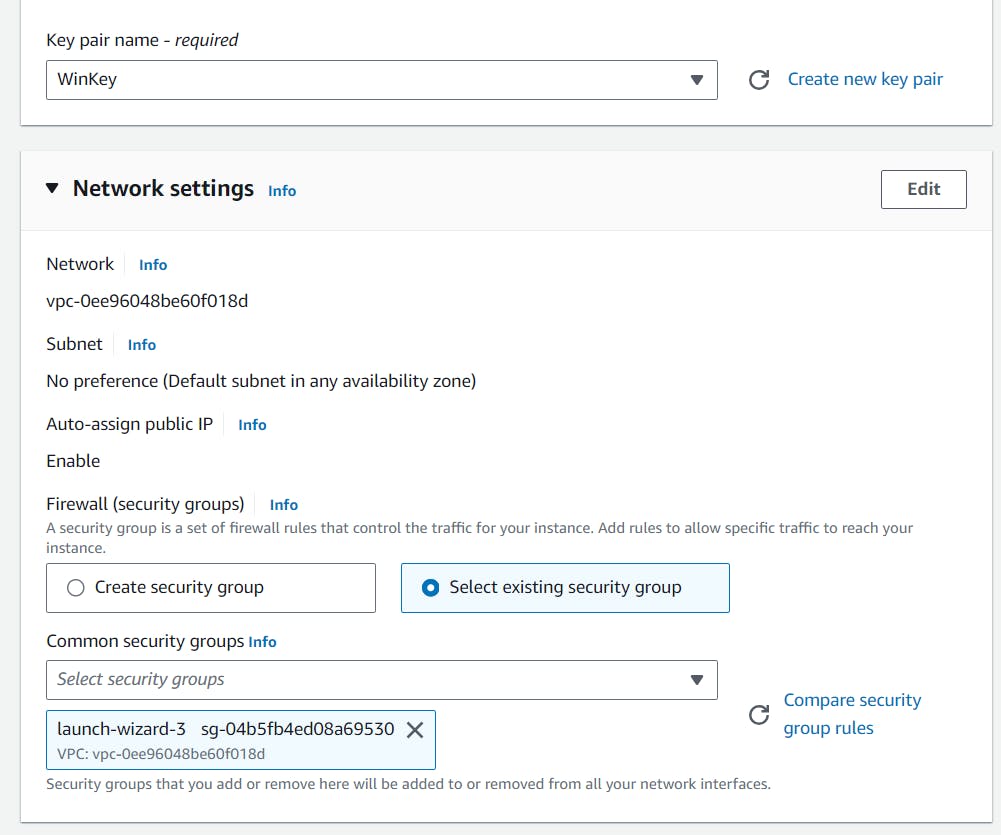
Create a key pair or you can continue without a key pair (Not recommended)
Create a security group or choose the default one
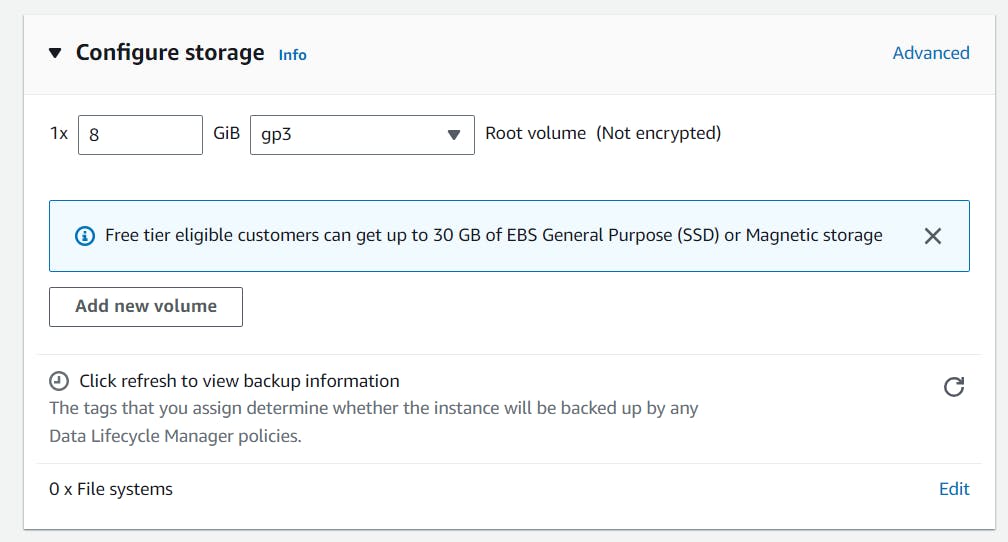
Configure the storage as seen in the image below
Leave everything else as default and click on "Launch instance"

We now need to launch our instance and connect to it and proceed to create an EBS volume and attach it to our EC2
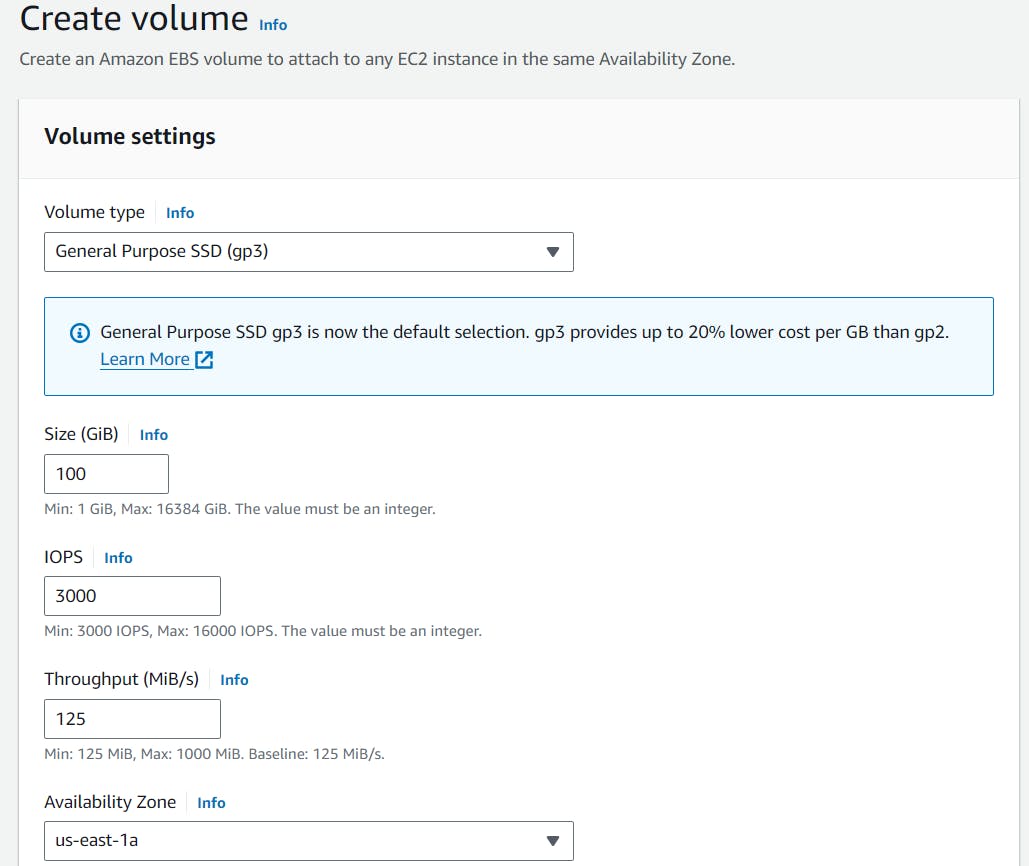
Let's create an EBS Volume
In the EC2 dashboard scroll down and click on "volumes" under Elastic Block Store category.

Click on "create volume"

Specify the volume type
Specify the size
Specify the availability zone (Same as the EC2 instance we created earlier)
Configure as seen in the image below.
Click on "Create volume"
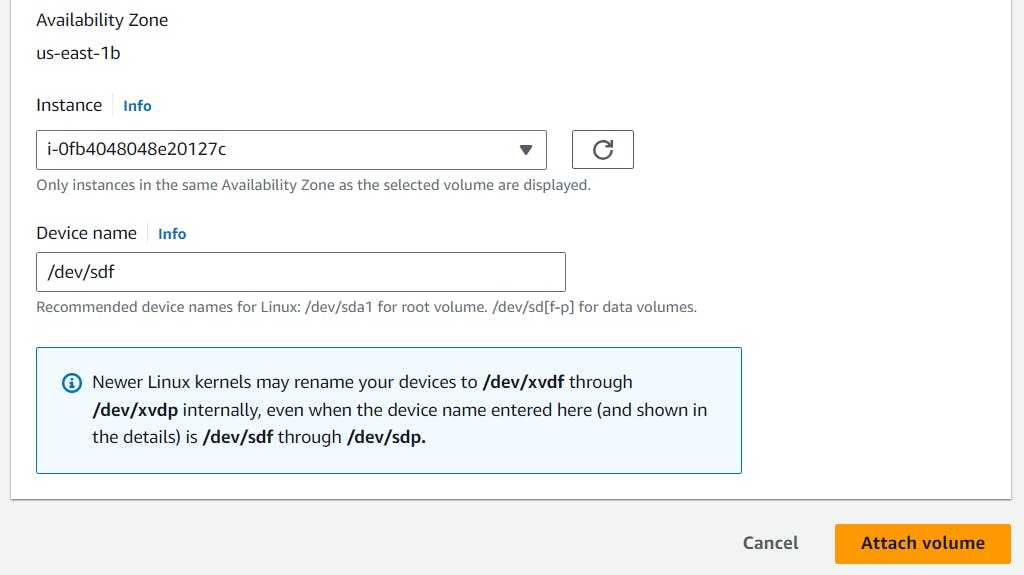
Now Let's attach the EBS volume to the EC2
Select the EBS volume we just created .
Click on "Actions" and then click on "Attach volume."

Click on the instance and choose the instance you wish to attach the volume from the drop down (The EC2 created earlier will show)
Specify the device name for the volume E.g. /dev/sdf
Click on "Attach volume" to attach the volume to the EC2 instance.
It's time to connect to the EC2 Instance and mount the EBS
Select the EC2 and click on "Connect"
Connect using the EC2 instance connect
Viola! We are connected to the EC2 terminal


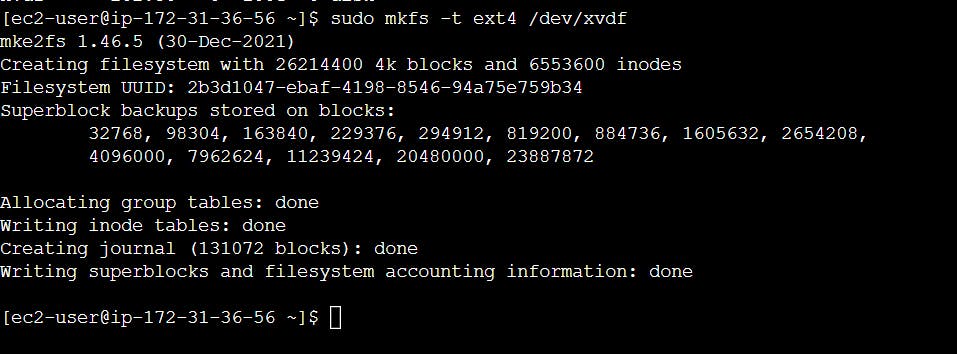
We need to run some commands on the EC2 terminal
Use the "lsblk" command to list the available disk drives
Once the attached EBS volume has been identified i.e the 100G volume (As seen in the image)

Use the "sudo mkfs -t ext4 /dev/xvdf" to format the EBS volume.
Use the "mkdir" command to create a mount point directory for the volume.
Use "sudo mount /dev/xvdf /data" to mount the volume at the mount point directory we just created.

Yes! We have successfully mounted the EBS volume!
Now let us navigate to the mounted directory and create a test file to be sure we can write to the EBS volume
Use "cd /data" to navigate.
Use "sudo touch filetext.txt" to create a test.
Use "ls" to list the content of the directory to be sure the file we just created is there
You can unmount the EBS volume if needed by using the "sudo unmount /data" command
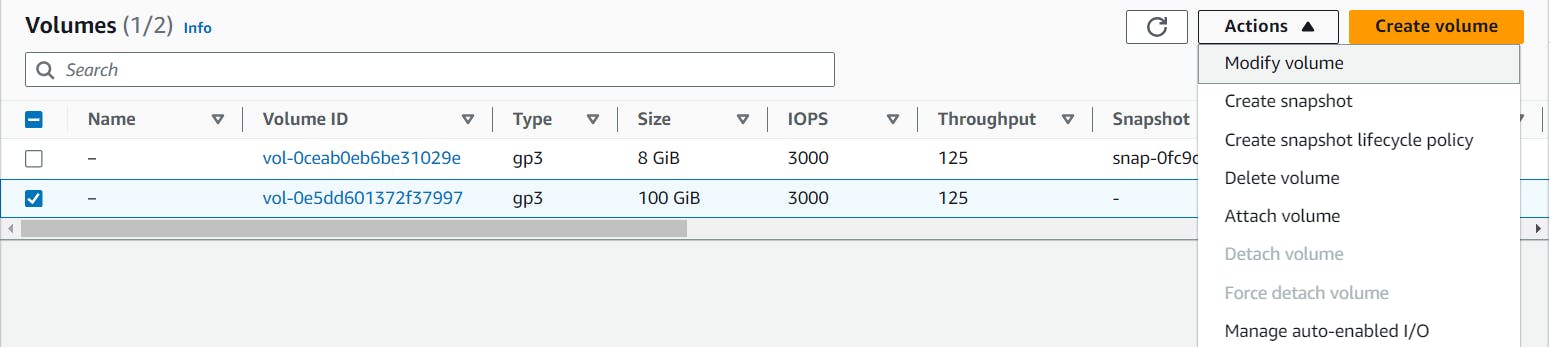
You can also delete the EBS volume by navigating to the dashboard
Select the EBS volume
Click on "Actions" and click "Detach volume"
Once you are done with the process, Please terminate the EC2 instance to avoid unnecessary charges

Navigate to the EC2 dashboard, select the instance
Click on "Instance state" and click on "Terminate instance"
Viola! We have completed our project.
We have learnt how to configure an EBS volume and attach it to an EC2 instance.